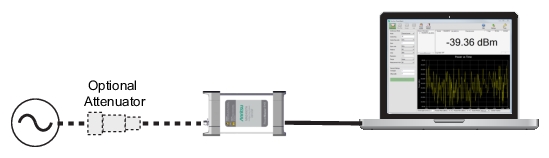
Do not apply power greater than the power sensor specifications or permanent damage may result. Connect a fixed attenuator to the output connector when power exceeds +20 dBm.
3. Connect the RF source to the RF IN port of the Power Master. Read the power measurement from the Anritsu PowerXpert application window (power readings are continuous with the default setting).
Connecting the DUT
RF signal connections are made to the male RF connector, which has a 50 ohm characteristic impedance. When connecting to the male connector of the Power Master, observe the following practice for tightening the connection:
1. While holding the body of the Power Master in one hand, turn the male connector nut to finger-tighten the connection. Do not turn the body of the Power Master as this will cause excessive wear to the connector.
2. Back off the connection by turning the connector nut counter clockwise 1/4 turn.
3. Tighten the connection (clockwise) using a 8 in-lb torque wrench (Anritsu part number: 01-201).
Zeroing the Power Master
Zeroing the MA245xxA Power Master is not required. All calibration factors, as well as temperature corrections, are stored in the Power Master. Therefore, there is no need for a reference calibration with the Power Master.