With repeated connections and disconnections, the threads and outer conductor mating interface builds up a layer of dirt and metal chips which can severely degrade connector electrical and mechanical performance. This debris can also increase the coupling torque required for a good connection which can then damage the mating interfaces. Cleaning of connectors is essential for maintaining good electrical performance. Therefore, connectors should be checked for cleanliness before making any measurements (or calibration).
See the RF and Microwave Connector Care Instruction Sheet 10100-00031.
Caution
Use the correct sized cotton swabs that are made specifically for cleaning small areas. Oversized cotton swabs can put lateral pressure on the center pin and damage it. Inspect after cleaning to be sure that no cotton strands get caught in the connector.
Required Cleaning Items
• Low‑pressure dry, compressed air (oil free, solvent free), maximum pressure: 40 PSI
• Lint‑free cotton swabs
• Isopropyl alcohol (IPA), >90 %
• Microscope Cleaning Procedure
Caution
Teflon Tuning Washers: The center conductor on some RF components contains a small teflon tuning washer located near the point of mating (interface). This washer compensates for minor impedance discontinuities at the interface. The washer’s location is critical to the RF component’s performance. Be careful not to disturb it with a cotton swab or compressed air and don't apply alcohol to it.
Compressed Air: Do not use compressed air on power sensors. Some power sensors have components internally located near the connector that can be damaged from excessive air pressure.
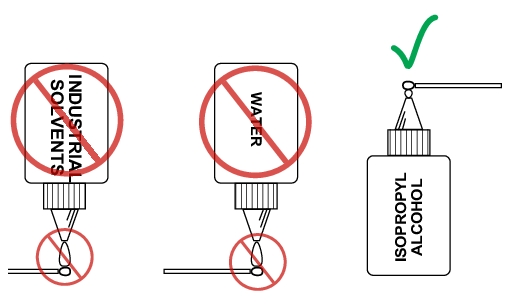
Solvents: Do not use industrial solvents or water to clean the connector. Use 90% Isopropyl Alcohol (IPA) only. Do not spray alcohol directly onto connector surfaces. Do not saturate the swab with alcohol. Instead, lightly dampen it by touching the tip onto a bead of alcohol formed at the bottle tip as shown in Figure: Isopropyl Alcohol Only.
Isopropyl Alcohol Only
Procedure
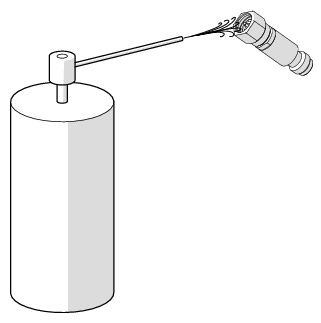
1. Remove loose particles on the mating surfaces, threads, and similar surfaces using low‑pressure clean (oil free, solvent free) compressed air (40 PSI max) applied at a shallow angle so foreign particles are not forced down into the connector.
Low Pressure Compressed Air Cleaning
2. Clean the threads of the connector with a lint‑free cotton swab dampened with IPA.
Caution
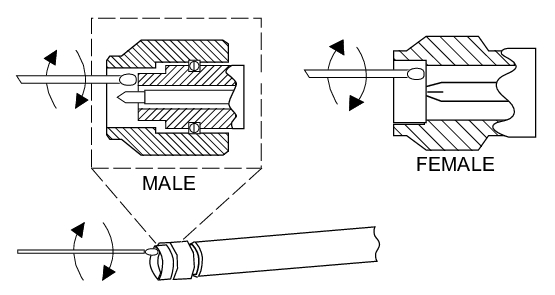
Do not insert cotton swabs at an angle or use a swab that is too large (Figure: Avoid Angled or Large Swab). Doing so can damage the center pin.
Avoid Angled or Large Swab
3. Clean the mating surfaces and connector threads by gently moving the cotton swab around the center pin. Avoid applying pressure to the center pin. See Figure: Cleaning Connector with Cotton Swabs.
When the connector is clean, you should be able to hand tighten the connector to within approximately one half turn of the specified torque.
Cleaning Connector with Cotton Swabs
4. After cleaning with swabs, again use low‑pressure compressed air to remove any remaining small particles and dry the connector surfaces.
5. Using magnification and adequate lighting, perform a final inspection of the connectors for damage or debris.