Self Test Procedure
Overview
This procedure uses internal routines to test basic system operation and performance. The procedure uses a mixture of commands from:
• Drop-down menus from the top Menu Bar
• Icons from the Icon Toolbar
• Application menus and buttons from the right-side user interface
Procedure
1. Before starting the performance tests:
a. Locate the appropriate AC source with:
• 90 VAC minimum to 264 VAC maximum
• Single phase
• 47 to 63 Hz power factor controlled
• Power output capable of 350 VA maximum
b. Connect the instrument to the AC source with the provided power cable.
c. On the instrument rear panel, turn the AC Input On/Off (I/O) switch to ON (I).
d. On the instrument front panel, press the instrument power key which is labeled Standby Operate Key.
• The key is located on the left side of the front panel, just above the test loops and the grounding banana jack.
e. The green Operate LED illuminates and system is on.
Note | Allow the system to warm up for at least 90 minutes to ensure operation to performance specifications. |
2. Perform an instrument self-test to ensure that the VNA is operating properly.
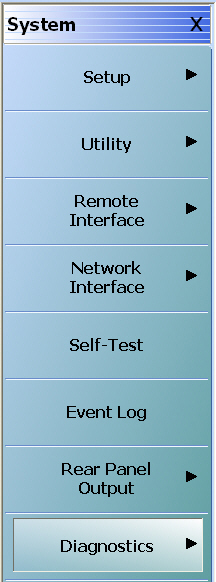
a. To start the instrument self test, use the Menu Bar at the top of the display.
b. Select MENU BAR | Utilities | System.
c. The right side SYSTEM menu appears.
3. Select the Self-Test button. The SELF TEST dialog box appears.
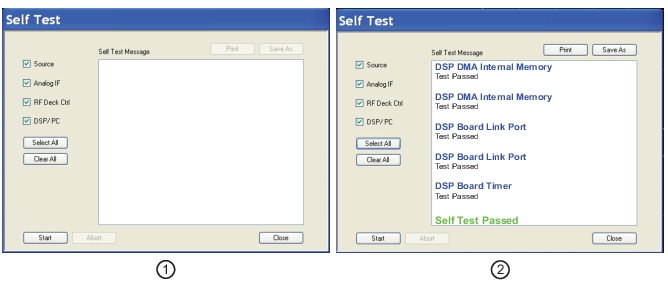
Self-Test Selections
4. Select all check boxes:
• Source
• Analog IF
• RF Deck Ctrl
• DSP/PC
Self-Test Results
5. Click Start to begin the initial self-test process.
• If the test is successful, the “Self Test Passed” message is displayed.
6. Click Close to exit the dialog box.