Instruments that are ordered from the factory with a rack mount option arrive with the rack mount hardware pre-installed. Alternatively, the rack mount option may be ordered at a later time and installed whenever required by the user. The general procedure to install the rack mount kit is described below:
1. Disconnect the line cord and any other attachments from the instrument.
2. Carefully place the instrument on a secure and stable work surface.
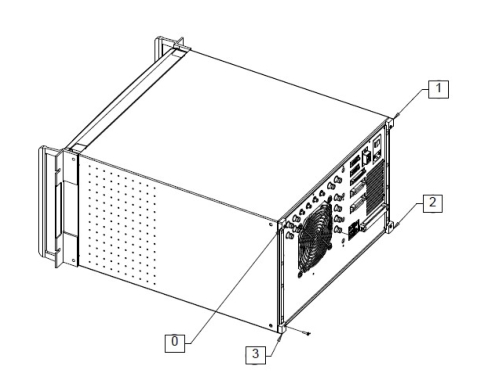
5. Install the machined corners onto the rear of the instrument using the hardware provided in the kit, referencing the number machined on each part. (See Figure: Attaching the Machined Corners to Instrument)
Attaching the Machined Corners to Instrument
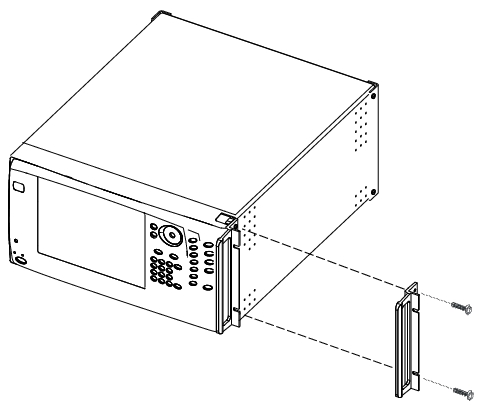
6. This completes the installation of the rack mount handles.