The following example illustrates how to set up Windows 7 for a static IP address. Refer to your operating system documentation or consult with your network administrator for other Windows versions or operating systems.
1. Connect an Ethernet crossover cable between the PC and the instrument.
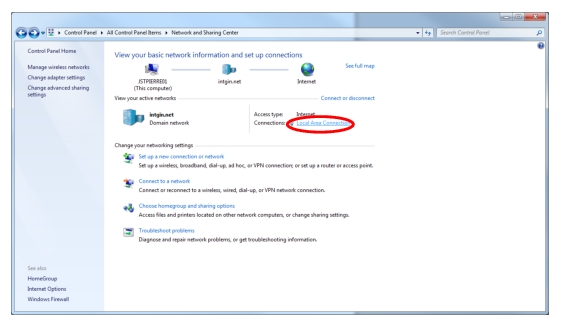
2. Open Control Panel, Network and Internet and select Network and Sharing Center.
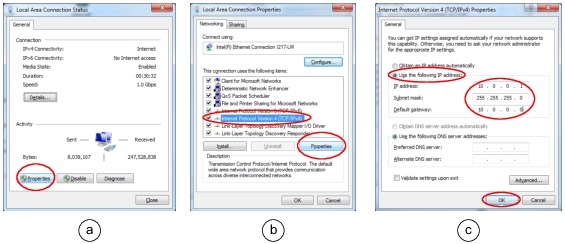
7. If you want to specify a domain name system (DNS) server, enter the preferred and alternate server addresses (Figure 2c). You may need to contact your network administrator for details about using specific DNS servers; otherwise, select Obtain DNS server address automatically.
8. Click OK.
The PC is now configured for a direct connection to the instrument using a static IP.