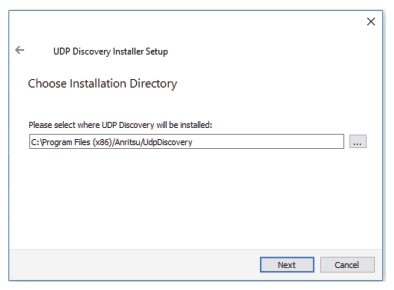
The UDP Discovery Tool is a Windows application that will display a sortable list of available MS2710xA devices on the network. This tool provides the ability to find and filter devices by Hostname, Model number, Serial number, MAC address, Version number, or by IP Address. If needed, the tool also provides the ability to save the results of your search and to view a brief history of your searches for comparison.
There could be many instruments already connected to the network. Use the selection filter to narrow the search results.
Select a filter method
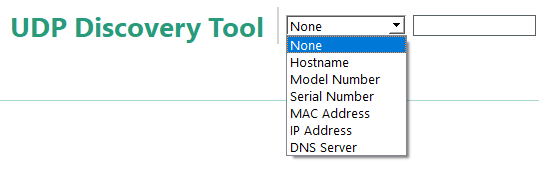
1. Click the connection arrow to display the filter list box are shown in Figure: Filter List Box.
Filter List Box
2. Click a filter method from the list. The selections available are None, Hostname, Model Number, Serial Number, Mac Address, IP Address, IP Address, and DNS Server.
If a Hostname, Model Number, Serial Number, Mac Address, IP Address, IP Address, or DNS Server is not known, select None.
• None: All instruments attached to the local area network will be listed.
• Hostname: Host name of the probe
• Model Number: Model Number of the probe
• Serial Number: Serial Number of the probe
• MAC Address: Medium Access Control (MAC) address
• IP Address: Internet Protocol (IP) address
• DNS Server: Domain Name System (DNS) server
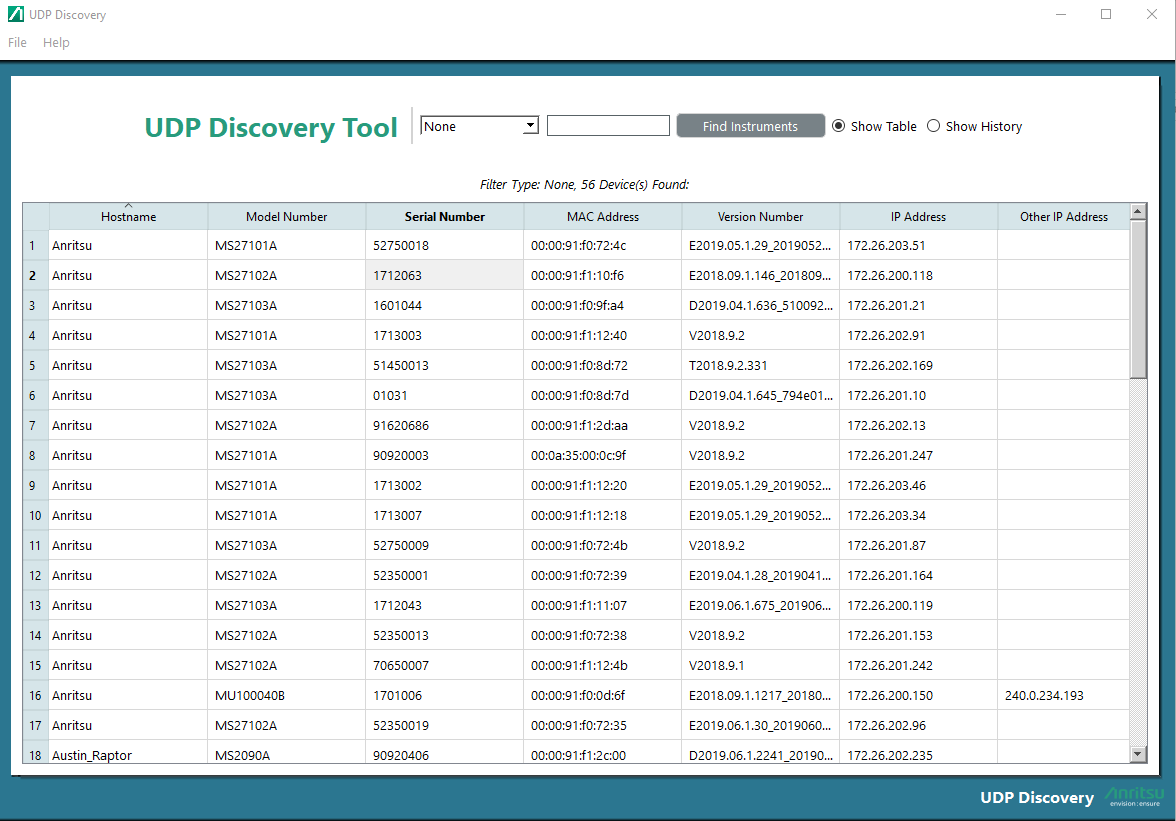
3. Click None to display an alphabetical listing of the inventoried instruments available to connect as shown in Figure: Displayed Instrument Inventory.
Displayed Instrument Inventory
Sorting the Listing
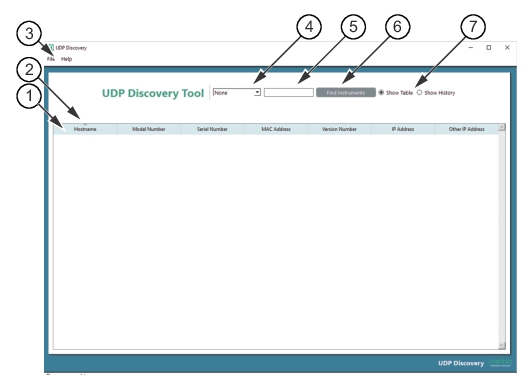
Selecting a column header displays a filter caret above column header as shown in Figure: UDP Discovery Tool User Interface. When the caret is clicked, the listing is sorted by the column in the direction the caret is pointing. Clicking the caret again reverses the caret direction and sorts the listing in reverse order.
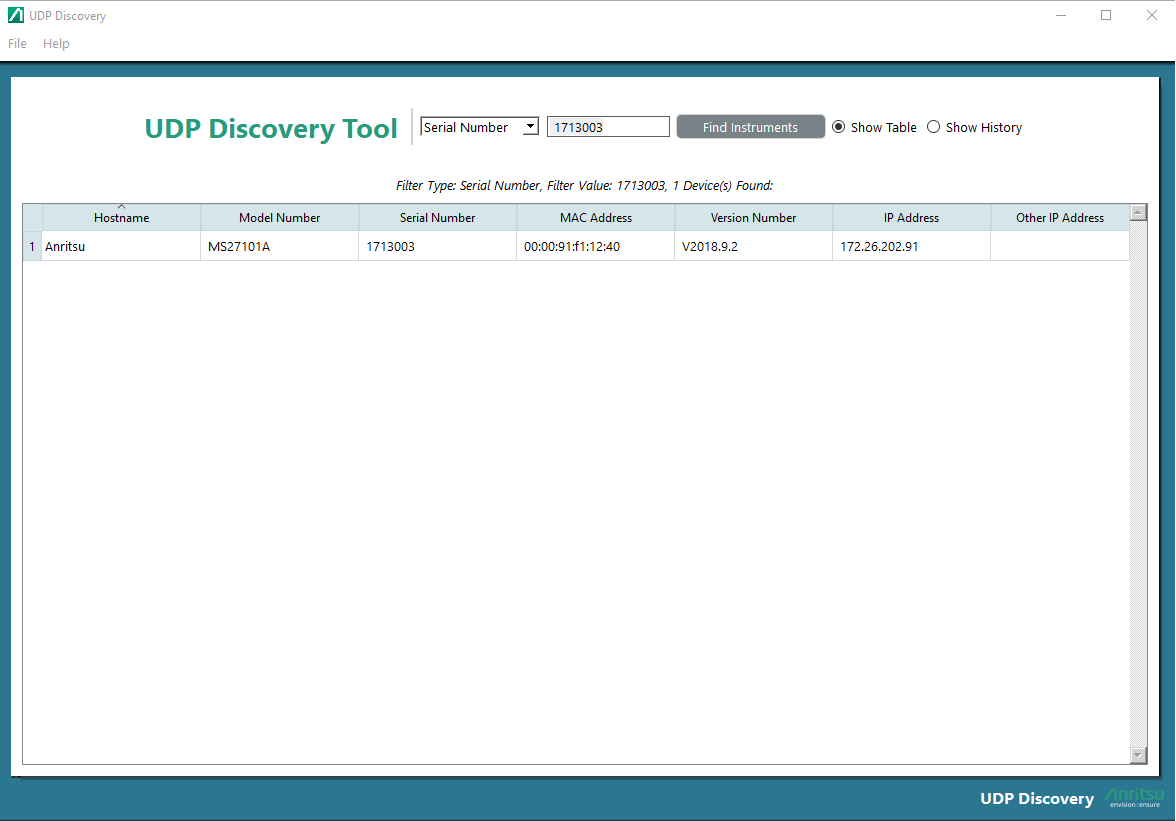
3. Paste the serial number in the box to the right of the filter list.
4. Click the Find Instruments bar. If the instrument is located, the instrument details will be displayed as shown in Figure: Locate Instrument.
A status readout is displayed above the column headings. In this example, the readout is:
Filter Type: Serial Number, Filter Value: 1713003, 1 Device(s) Found:
If the device could not be found, the last section would read: No Device Found
Locate Instrument
Connecting another device will erase the Show Table log and display the new device details. The previous erased device details will be available in the Show History log until the history details are erased. SeeClearing the History.
User Interface Display Types
The selectable radio buttons provide the Show Table and Show History user interface connection display.
Show Table
Click this radio button to display the device connection details as shown in Figure: Locate Instrument.
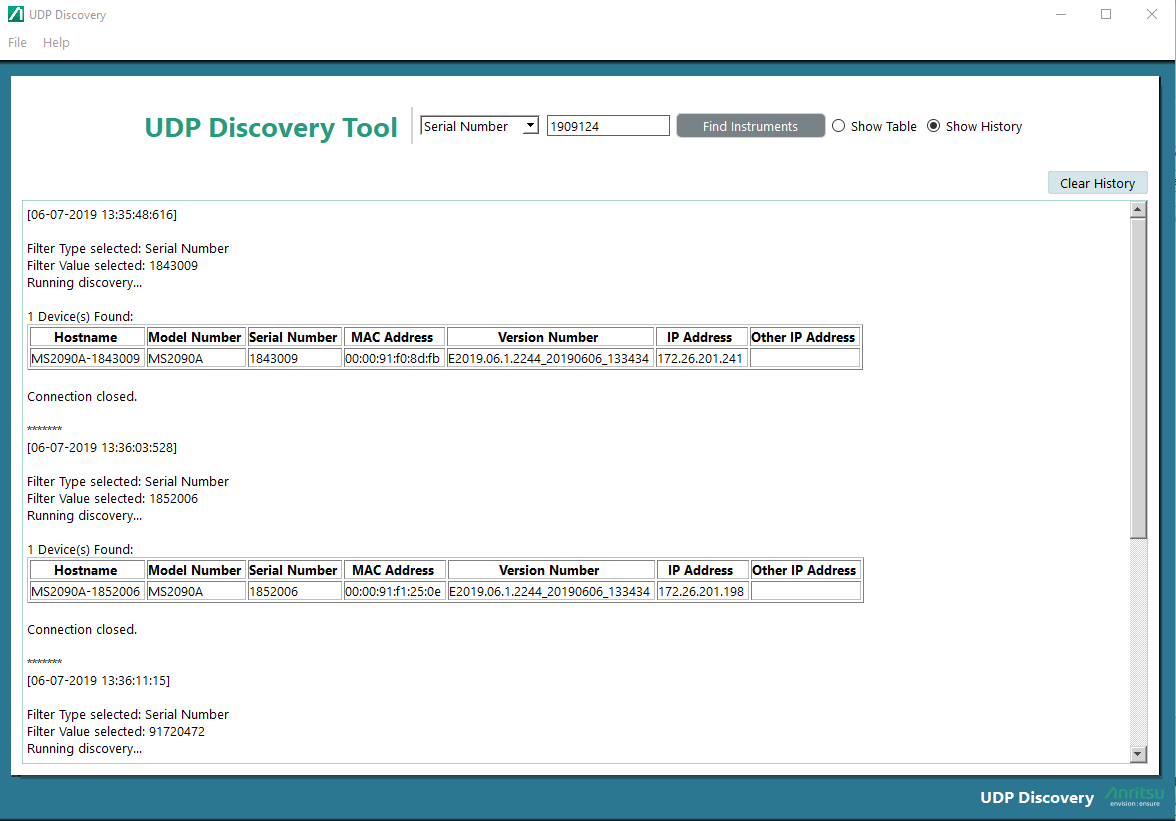
Show History
Click this radio button to display current and previous connection-activity details as shown in Figure: Show History.
Show History
Clearing the History
Clear the Show History log by clicking the Clear History button or by clicking Clear Log from the Toolbar File menu.