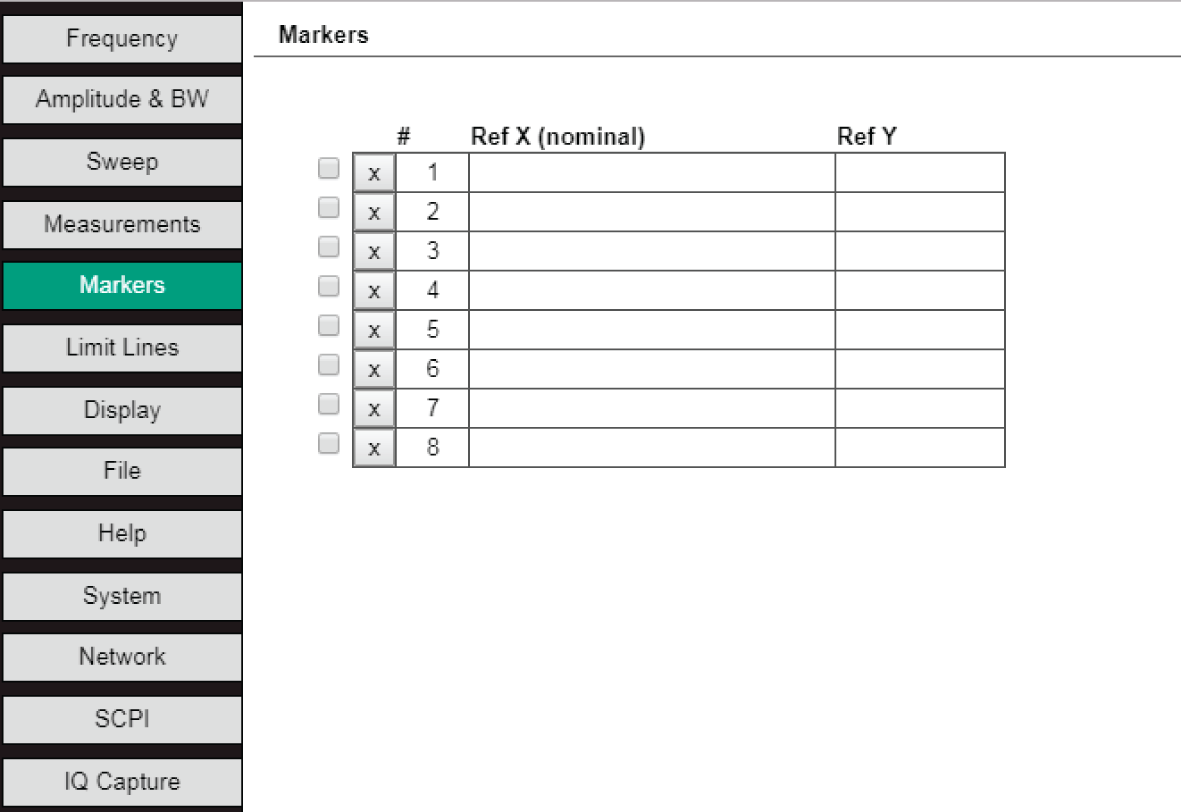
Select the Markers tab to set up Markers Setup Panel.
Markers Tab
1. Click the check box of the desired Marker.
2. Click on the Ref X entry box. Place the mouse cursor over the measurement display and a vertical line is drawn with its associated frequency and amplitude displayed in the Marker table.
3. Setting the frequency:
• Type the desired frequency and units into the box.
• Move the horizontal line cursor onto the trace at the desired point and click the left mouse button. The frequency value of that point is entered into the marker table. In the display, a red marker is created with it labeled 1, 2, 3, 4, 5, 6, 7, or 8.
In either type of entry, the amplitude of the trace of the entered frequency will be automatically entered into the Amplitude box. If a frequency entry box is selected, the associated marker will be red. Markers with unselected frequency boxes are colored green. Deselect the marker/s by clicking on the desired check box.