Load a map to the Simulator program to build the drone coverage area. For more information on loading maps, see
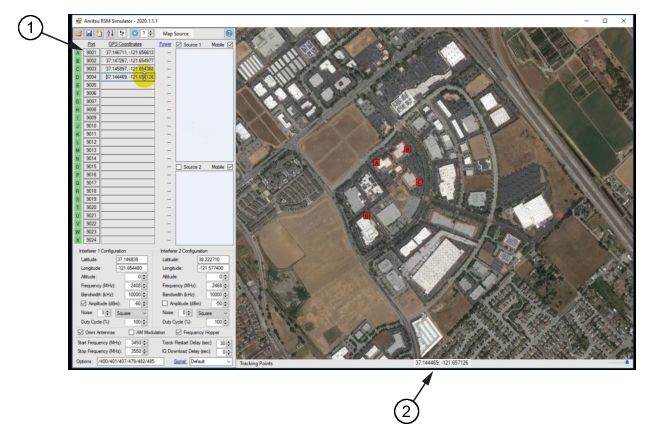
Maps. Each area to be monitored requires at least three RSMs placed in a triangular pattern. Each RSM is positioned manually onto the map by the user. Move the mouse pointer across the map and view the coordinates readout at the bottom that tracks the mouse pointer’s point of reference on the map. Right-click the map at the desired RSM placement and a dialog box appears as shown in
Figure: Simulator Map. From the dialog box, click
Copy Coordinates to clipboard. The represented RSM geographic coordinates at the bottom of the map will be copied.
Move the mouse pointer to the GPS Coordinates column of the Simulator and paste the coordinates as shown in
Figure: Copy and Paste RSM Coordinates. Once the coordinates are pasted, an RSM appears on the Simulator map at the clicked point of reference. In this example, the RSM “D” coordinates pasted in the GPS Coordinates column results in the RSM “D” being placed on the Simulator map.