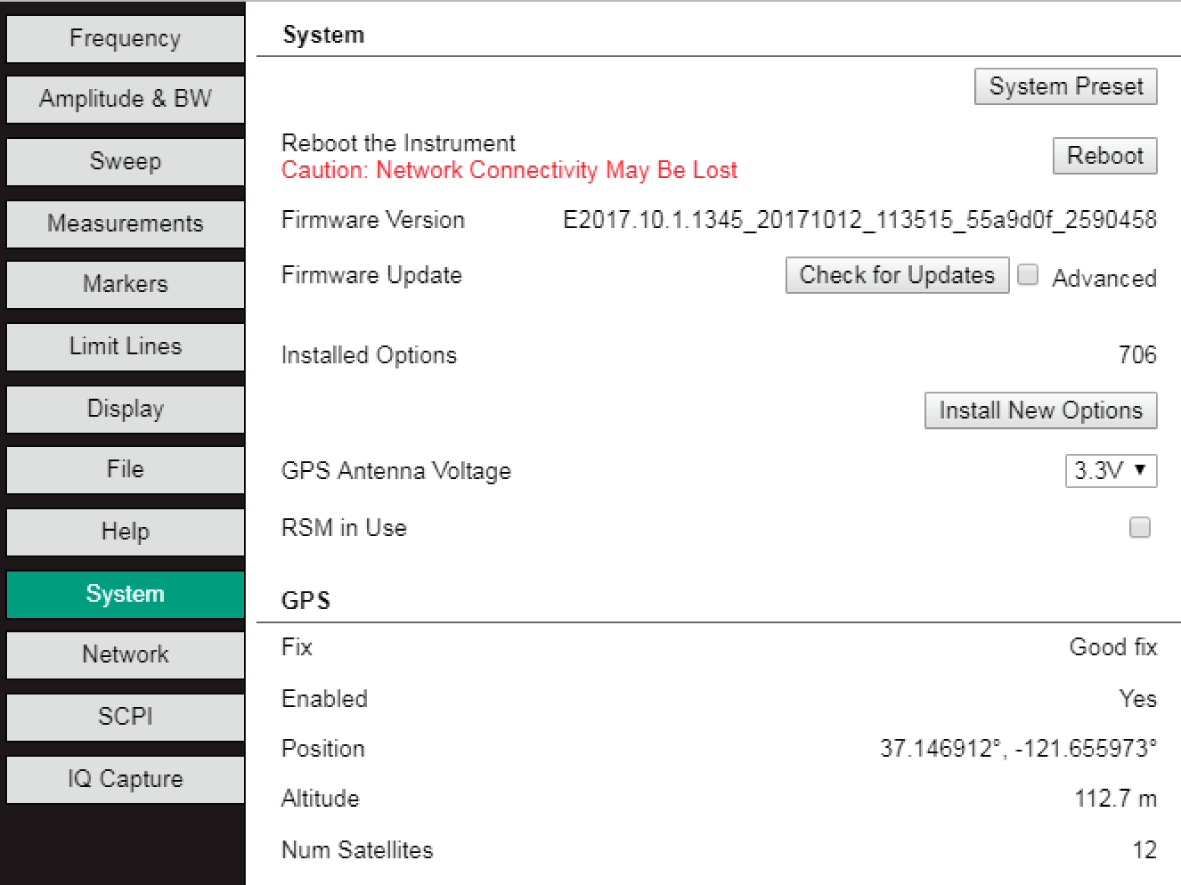
Select the System tab to perform firmware updates, presets, other functions that affect the whole system, and view GPS information.
System Tab
The System section contains system information such as firmware version, installed options, Remote Spectrum Monitor GPS status, and RSM-in-use setting. Here the GPS supply voltage can be set to 3.3 V or 5 V.
When a System Preset is initiated the system is restored to factory default settings. See Table: Primary Factory Settings Primary Factory Settings.
Primary Factory Settings
Parameter
Value
Start Frequency
0 Hz
Stop Frequency
6 GHz
Center
3 GHz
Span
6 GHz
RBW
3 MHz
VBW
1 MHz
SPAN/RBW
100
RBW/VBW
3
VBW type
Linear
Reference Level
+10 dBm
Reference Level Offset
0 dB
Y-Axis Scale
10 dB/div
Attenuation
30 dB
Preamp
Off
Detection
Positive
Antenna Number
1
Trace Operation
Normal
Sweep Type
Continuous
Sweep Mode
FFT
Display Point Count
501
Font Size
10 pt
Show Spectrogram
Yes
GPS Supply Voltage
3.3V
To return the instrument to its original default settings, press the System Preset button.
Power down and then power up the instrument using the Reboot button. (Network connectivity could be lost during this function. If the unit is configured for DHCP, then its IP address could also change after the reboot.)
Firmware Version and Installed Options display the current version of the firmware and the options included in the firmware.
Set the supply voltage for the GPS antenna in use by clicking on the GPS Supply Voltage list and selecting the desired voltage.
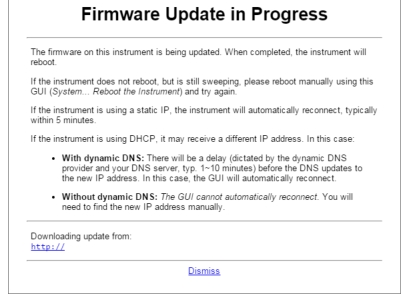
Press the Check for Updates button to check for recent releases of firmware. A simple check will be done by the software server to see what version of software is on the instrument. If the current firmware is up to date, you will be notified that it is. If not, a dialog will display and state that new firmware is available. Press the Install Update button to install the new firmware. The Advanced check box opens a firmware list - the current release, new firmware if available, and previously released versions of firmware. Select the desired firmware version and press the Update to Selected button.
To inform users that the RSM is in use, click the RSM in Use check box. Red text in browser will inform users that the RSM is in use.
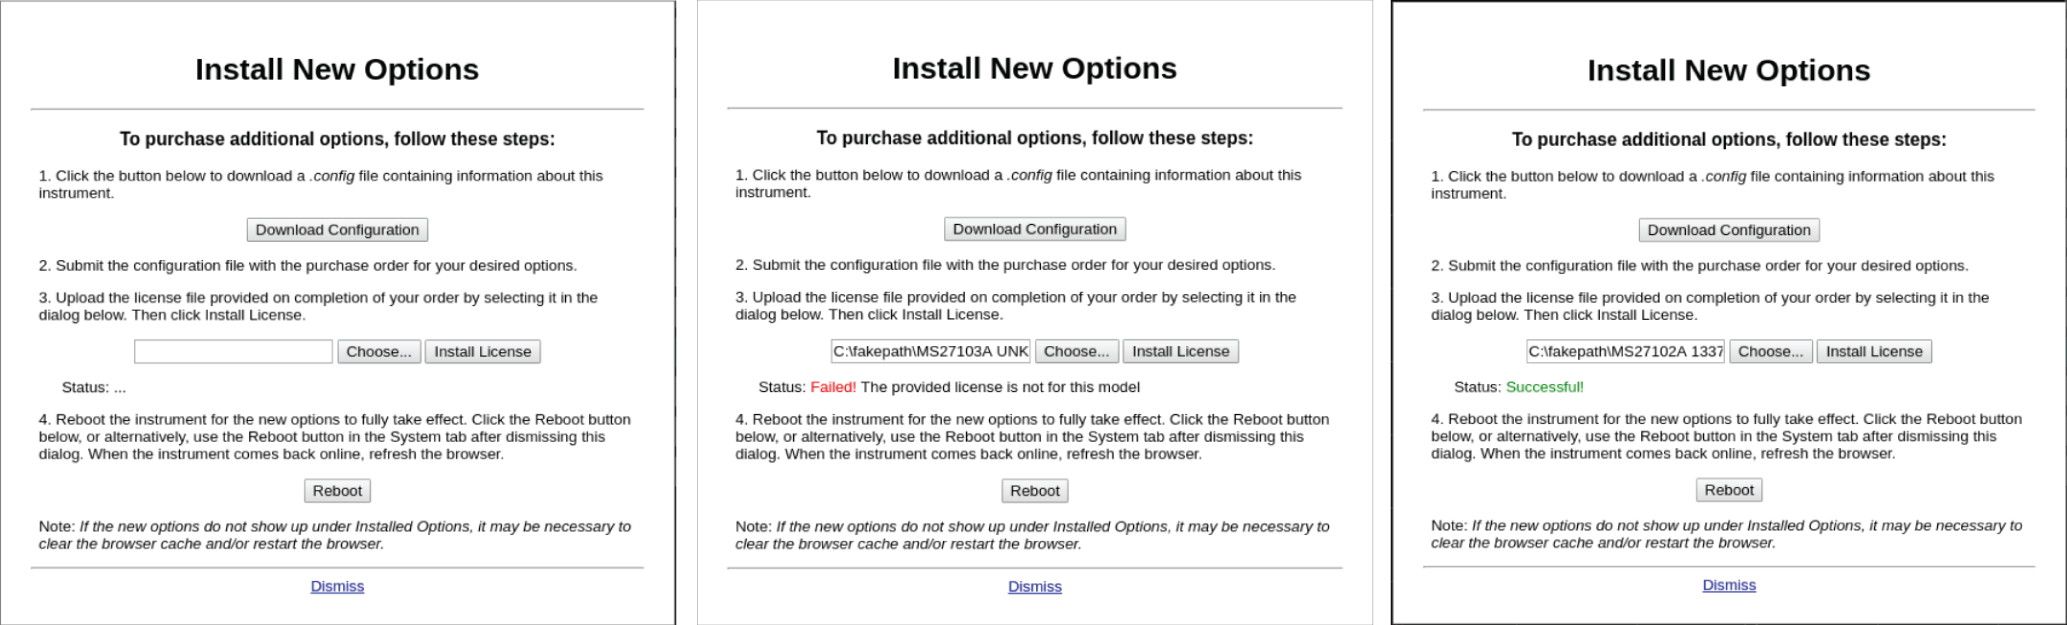
Install New Options
To install new options, go into the System tab and select Installing Options. The Installing Options dialog will appear. See Figure: Install Options in Progress Dialog.
Install Options in Progress Dialog
Follow the instructions that appear in the dialog box. If the license installation was unsuccessful, a red Failed! message will appear in the Status field. If the license installation was successful, a green a Successful! message will appear in the Status field.
Continue with the option installation process by rebooting the instrument to activate the new options.