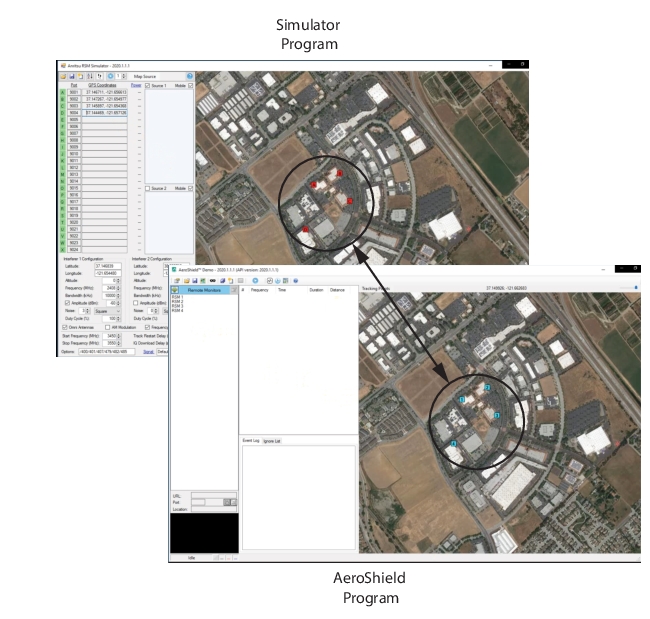
Load the RSMs from the Simulator shown in Figure: Copy and Paste RSM Coordinates to the AeroShield program. Note that the Simulator RSM uses letters to identify the RSM and AeroShield uses numbers. So Simulator RSM A = AeroShield RSM 1, Simulator RSM B = AeroShield RSM 2, Simulator RSM C = AeroShield RSM 3,... Simulator RSM X = AeroShield RSM 24.
Add RSMs to AeroShield Program
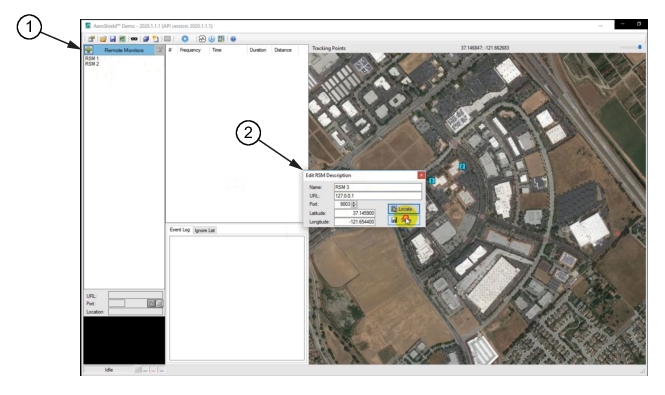
1. “+” Icon Button
2. Edit RSM Description Dialog
In the AeroShield program, click the “+” icon located in the Remote Monitors column as shown in Figure: Add RSMs to AeroShield Program. The Edit RSM Description dialog appears. Enter the description of each RSM as follows:
Name: Initially, RSM 1 automatically appears in the Name field and sequences to the next RSM when the Add button is clicked again. To change the RSM designator in the Name field manually, type in the desired RSM number.
URL: Type in the URL. For the Simulator program, type 127.0.0.1.
Port: Automatically populates with the next port as it appears in the Simulator program. To change the Port designator in the Port field manually, type in the port number or use the arrow keys.
Locate: Click to automatically paste the RSM coordinates into the Latitude and Longitude fields. The RSM will appear in the map at the location designated by the coordinates as shown Figure: Add RSMs to AeroShield Program, For this example, RSM 1 and RSM 2 have been added and RSM 3 is in process. When the dialog box is closed, RSM 3 will appear at the point of reference on the AeroShield map.
Figure: Four RSMs Added shows four RSMs geographically positioned in the Simulator program and successfully transferring the RSM coordinates to the AeroShield program. Once the AeroShield map contains positioned RSMs, the user can continue to develop a drone detection coverage area.