Icon | Description |
 | Trace Monitor Anritsu Logo This icon is located at the top-left corner of the Trace Monitor GUI screen. Click to provide GUI display screen size viewing choices. 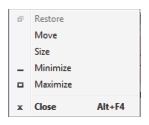 • Restore: Resets the GUI display to the default view. This selection is active only after Maximize has been selected and the GUI screen is in a full screen mode. Restore is normally grayed and only becomes available after Maximize is active. • Move: Move the GUI display screen. • Size: Click a corner of the GUI display and resize the display by dragging the corner. • Minimize: Minimizes the screen to the bottom tray, but the remains active. Click it from the tray to view the GUI display. • Maximize: Changes the screen to full size. • Close: Closes the GUI screen display. |
 | Maps, Trace Files, and Program Settings View the menu shown below. 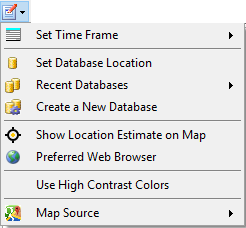 Set Time Frame Set the total time contained for all rows and columns in the visible Time Chart as shown below. The selected time set provides the amount of time for each green, red or black square. Changing this setting does not affect the rate at which new traces are collected. 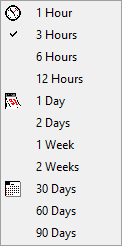 Set Database Location View new database location dialog. Recent Databases Click recently created database selections. Create a New Database Click to create a new database. See Create a Database. Show Location Estimate on Map View a signal’s location in the map display. Preferred Web Browser View a menu of preferred Web Browsers. Use High Contrast Colors Show a color palate that is applied to the Trace Matrix block display for color identification of pass/fail traces. Map Source Displays a menu of map sources as shown below. 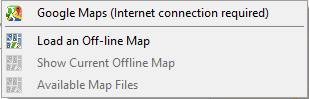 • Google Maps: Opens Google maps. • Load an Off-Line Map: Click to open an off-line map directory and load a map. • Show Current Offline Map: Click to show the current offline map file. • Available Map Files: Click to display the available map files. |
 | Panels Switch Click to show the spectrum measurement, spectrogram, and time matrix panels from either the live data stream window or monitor map window. |
 | Show Probe Map Click to display a larger map for the current trace channel selected on the right side where the trace panel, spectrogram, and trace matrix were located. See Probe Map. |
 | Live Data Stream Click to display the Vision Live Trace Viewer user Interface. Live stream the selected current spectrum monitor display. See Live Data Stream. |
 | Open Trace Viewer Window Click to open the menu shown below. 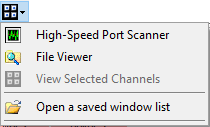 High-Speed Port Scanner Click to open the High-Speed Port Scanner. High-Speed Port Scanner allows you to quickly monitor the channel power on any number of channels. See High-Speed Port Scanner (Option 407) for information about this application. File Viewer Click to run the File Viewer application. See File Viewer. View Selected Channels Loads the selected channels into the Trace Viewer window to view simultaneously. See Vision Trace Viewer. Open a saved window list Opens the Open dialog to load a *.vwl file (vision windows list). Click to load. Save Window List saves the currently displayed trace window selections for future loading. Previously opened VWL files will list under this command. |
 | Location Finder (Option 401) Opens the Source Locater window to Geo-locate the signal of interest. See Vision Locate (Option 401). |
 | Report Generation and Options Menu Open the menu shown below. 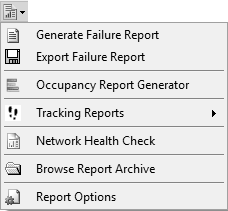 Generate Pass/Fail Report Click to show a Vision Monitor Failure and Status Report displayed in your Internet browser. Generate Failure Report: You can generate a failure report (menu selection) but you will only get one trace image and only for the last pass if 'Include trace image' is selected in the options, and if there is a failure on the last sweep. refer to Generate Failure Report. Export Failure Report Provides a report, exactly the one produced by Generate Failure Report, but outputs the data into a .txt file with the name Vision Status + date stamp + time stamp.txt. The file is placed in the folder set using the Report Options function. Occupancy Report Generator Tracking Reports Point to Tracking Reports and click the appropriate time setting from the list shown below. Network Health Check Click to open the Vision Health Check Report as shown below. For a description of the Vision Health Check Report, see Vision Health Check Report.  Browse Report Archive Click to review or open files exported to that folder. Report Options Click to open Vision Reports Options dialog. See Vision Report Options. |
 | Copy and Paste |
Search for base station Type the name of the desired base station and click the Binocular. | |
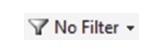 | Base Station Filter Point to the Base Station Filter menu and click the appropriate command listed below. • No Filter - Show All: Click to view all spectrum monitors in the base station list. • Filter by Map: Only base stations viewed in the map will be displayed in the Base Station list. • Failure by Last Sweep: Base stations with channels whose last trace failed will remain on the list and displayed in Map view. • Failure in Past Hour: Base stations with channels that had a trace fail within the last hour will remain on the list and displayed in Map view. • Failure in Past Day: Base stations with channels that had a trace fail within the day will remain on the list and displayed in Map view. |
 | Help Click opens Help. |