 |
|
Icon | Description |
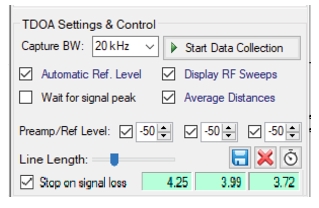
 | Capture BW Capture Bandwidth, Bandwidth (Span) of the sRF signal of interest. Pull-down menu provides entry of 20 MHz, 13.3 MHz, 6.67 MHz, 2.67 MHz, 1.33 MHz, 667 kHz, 267 kHz, 133 kHz, 66.7 kHz, 26.7 kHz, and 13.3 kHz. |
 | Start Data Collection Start Data Collection will repeatedly execute the TDOA measurement. New TDOA results are only averaged when the Correlation Ratio is higher than 30. After being clicked, the button will change to Stop Data Collection. Click it to end data collection. Refer to TDOA Settings & Control for Start Data Collection details. |
 | Automatically Reference Levels Click the Automatic Ref. Level check box to perform a 20 sweep max-hold RF trace capture to determine the optimal reference level setting. Continuously capture I/Q data sets until stopped. Refer to TDOA Settings & Control for Automatic Reference Level details. |
Display RF Sweeps Click the Display RF Sweeps check box to display RF spectrum traces after each I/Q capture. | |
Wait for signal peak Click the Wait for signal peak check box Remove dead time from the IQ data set. | |
Average Distances Click the Average Distances check box for better accurate results. Refer to TDOA Settings & Control for Average Distances details. | |
Preamp/Reference Level Click the Preamp/Ref Level check box to activate the preamp. Type or enter a range from -200 dBm to +50 dBm. | |
Line Length Move the slider to set the line length for map. | |
Save IQ Save IQ Data to disk file. See TDOA Settings & Control. | |
 | Clear Clear all results from averages. See TDOA Settings & Control. |
 | Calibrate Delays Calibrate probe channel delays. See Channel Delay Calibration. |
Stop on Signal Loss Click the Stop on Signal Loss check to automatically stop data collection if the signal is lost. | |
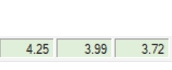 | Correlation Ratio Panel The three panels from left to right are: • Correlation Ratio panel 1: Correlation ratio for probes 1 and 2. • Correlation Ratio panel 2: Correlation ratio for probes 1 and 3. • Correlation Ratio panel 3: Correlation ratio for probes 2 and 3. |